Steve Davis
- I currently work as a computer programmer for a medical transcription and coding company. For nine years, I worked for AT&T, doing work on interactive voice response systems, NaturalVoices text-to-speech, and Watson speech recognition software.
- At home, if I find the time, I usually program in Python because it's a very nice, easy to use language with a clean design and lots of useful libraries.
- I also enjoy working on improving our houses after work and on weekends. There's a lot of work that can be done on two 110+ year-old houses...
- For a diversion, I do some woodworking. My largest project is finally finished: a crib for Katharine. I've started work on a violin, though it's going slowly. I also play viola in the Mankato Symphony Orchestra.
- I also enjoy cooking and baking (especially bread, desserts, and candies), and homebrewing beer and wine.
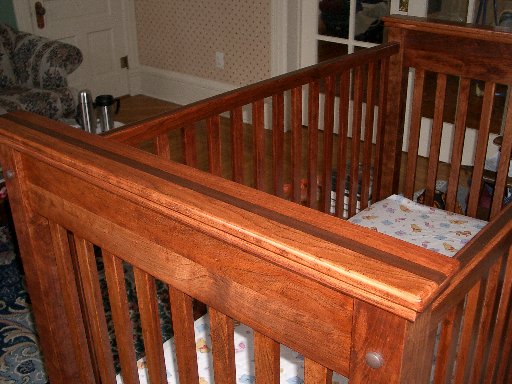
The finished crib.

A wider view of the crib.

One end of the crib, before assembly.
A brief history of the crib project
The crib project came about because I wanted to build something for Katharine. Having done some work with wood before, it seemed like it would be possible, though a lot of work.
I started on the project in June, hoping to have it done by October 1st. But Katharine came a a bit early, so I didn't have so much time to work on it after her birth September 14th. I finished the crib on December 24th, and assembled it by the Christmas tree that evening.
I started with a plan I bought on the Internet - a fairly standard plan, with some good ideas for construction. However, it assumed using large stock to start with and ripping down to size. Since I don't yet own a table saw or a functional bandsaw, this would have been difficult.
However, I did have the luck to receive about 250 board-feet of glued-up cherry panels from a cabinet shop. These panels were rejected for surface defects, being too thin, etc. Most of the panels are between 1/2" and 5/8", with a few being a full 3/4". Most of the panels are around 30x30 inches, though some are smaller or larger.
The crib plan I purchased suggested cutting the slats to about 3/8" thickness, which seemed a bit flimsy to me, especially in cherry (the plan suggested maple or oak). So I decided that the slats should be 5/8", meaning that the rails would have to be around an inch thickness, minimum, to accept the slats. So the side rails and ends are each glued up from two pieces of 5/8" stock. Because my rails were thicker than the suggested 3/4", I then enlarged the dimensions of the legs slightly, from 2 inches to about 2 1/4.
The legs are constructed from three layers of 3/4" plywood, which I glued up, cut to size, and applied cherry veneer to. Certainly less expensive than buying such large pieces of solid wood. It also gave me an advantage, as I was able to cut mortises for the end rails before I assembled the legs (I just cut the mortises out from the center piece of plywood in the three-layer sandwich).
As a decorative touch, the ends and side rails have a 3/4" walnut inlay. I felt the crib would be a bit boring without some sort of contrast. As a side benefit the inlay hides the glue joints on the rails.
Since most of the wood is second-hand, there were some inevitable glue joints (most of the glued-up strips were no more than about 2 1/2" wide). But on the whole, I don't think they detract from the finished piece. I cut almost all of the slats to avoid glue joints where possible.
I added leveling gliders to the feet, which also protect the veneer on the legs if the crib is pulled across the floor. Each of the four side rails has a threaded brass insert, so the side gates are attached with two bolts through the legs and into the inserts. This means that neither side gate can be "lowered" - a drawback when the baby is small or when trying to change the linens. The advantage is that the crib is quite sturdy - I am a bit nervous about many cribs, which feel as if they might fall apart with very little abuse.
The mattress is supported by a sheet of 3/4" plywood and four angle brackets. The height is adjustable to either high (mattress top 9" from top of rails), or low (mattress support 26" from top of rails), by moving the brackets. I expect to be able to convert the crib into a youth bed by replacing one side gate with a matching lower rail (yet to be built!)
The crib is finished with a light coat of oil-based stain, and three coats of satin polyurethane. There are a lot of different suggestions on the appropriate finish for a crib, but no consensus. I finally decided that since polyurethane was used on commercial cribs, it was probably fine for mine as well.
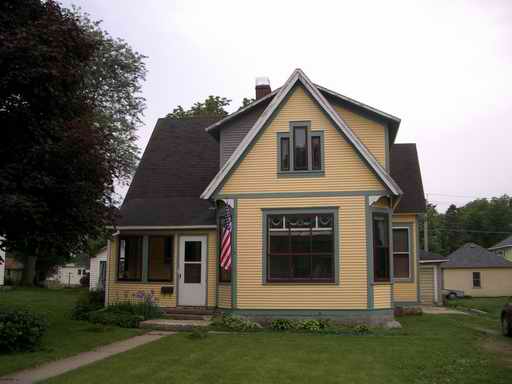
Our house
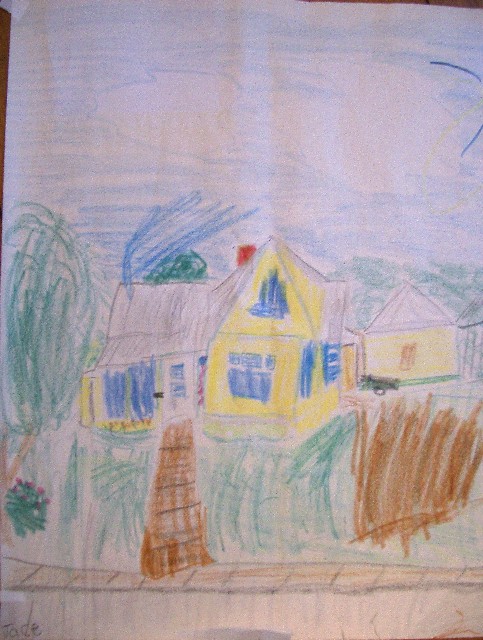
A drawing of our house, by our nephew Jade.
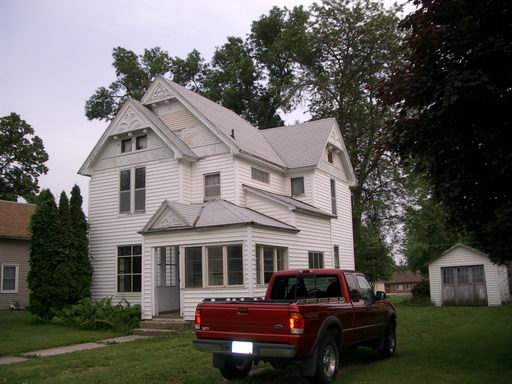
The house next door (our other house)